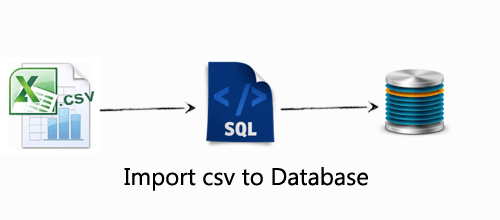
In this tutorial, I will let you know how to import excel or csv file into database table and export or download in different format using maatwebsite package with the power of PHPOffice's PHPExcel.
For e.g. you can download the file in xls format, xlsx format and csv format.
There are lots of functionality available with Laravel Excel, such as you can also export blade view for a single sheet, load different view for different sheets.
Step 1: InstallationIn this step you need to require "maatwebsite/excel" package into your application. So update your composer.json file by adding following line in require package :
"maatwebsite/excel": "~2.1.0"
After adding above line into composer.json file run following command to update composer :
composer update
Once composer file get updated successfully then add service provide and aliases to the providers and aliases array respectively in config/app.php.
'providers' => [
	....
	'Maatwebsite\Excel\ExcelServiceProvider',
],
'aliases' => [
	....
	'Excel' => 'Maatwebsite\Excel\Facades\Excel',
],
To publish this config setting in Laravel 5, you need to run following command :
php artisan vendor:publish --provider="Maatwebsite\Excel\ExcelServiceProvider"Step 2: Create Table and Model
In this step, we need to create table where you will import data from excel or csv file and export that data in required format.
If you wish, you can run migration command to create table using php artisan command in Laravel 5 or directly you can create table into your database from phpMyAdmin, GUI for your database.
OK, we will here create table by using migration command, so first create migration file by running following command :
php artisan make:migration create_products_table
Once you run above command then you will see migration file in following path database/migrations where you define table schema.
Open the migration file and put following line of code for demo :
- use Illuminate\Database\Schema\Blueprint;
- use Illuminate\Database\Migrations\Migration;
- class CreateProductsTable extends Migration
- {
- public function up()
- {
- Schema::create('products', function (Blueprint $table) {
- $table->increments('id');
- $table->string('name');
- $table->text('details');
- $table->timestamps();
- });
- }
- public function down()
- {
- Schema::drop("products");
- }
- }
Once products table has been created successfully into your database then create Product model for the table products.
Create a file Product.php in following path app/Product.php and add following line of code into that model file.
- namespace App;
- use Illuminate\Database\Eloquent\Model;
- class Product extends Model
- {
- public $fillable = ['name','details'];
- }

In this step, we will add route to handle request for import and export file.
You will see your route file in following path app/Http/routes.php, so open your route file and add following routes.
Route::get('import-export-csv-excel',array('as'=>'excel.import','uses'=>'FileController@importExportExcelORCSV'));
Route::post('import-csv-excel',array('as'=>'import-csv-excel','uses'=>'FileController@importFileIntoDB'));
Route::get('download-excel-file/{type}', array('as'=>'excel-file','uses'=>'FileController@downloadExcelFile'));
Step 4: Create Controller
Now we will create a controller FileController.php in following path app/Http/Controllers/.
In FileController, we will write functionality to read file data to import into table and download the table data into excel sheets.
app/Http/Controllers/FileController.php
- <?php
- namespace App\Http\Controllers;
- use Illuminate\Http\Request;
- use App\Http\Controllers\Controller;
- use App\Product;
- class FileController extends Controller {
- public function importExportExcelORCSV(){
- return view('file_import_export');
- }
- public function importFileIntoDB(Request $request){
- if($request->hasFile('sample_file')){
- $path = $request->file('sample_file')->getRealPath();
- $data = \Excel::load($path)->get();
- if($data->count()){
- foreach ($data as $key => $value) {
- $arr[] = ['name' => $value->name, 'details' => $value->details];
- }
- if(!empty($arr)){
- \DB::table('products')->insert($arr);
- dd('Insert Record successfully.');
- }
- }
- }
- dd('Request data does not have any files to import.');
- }
- public function downloadExcelFile($type){
- $products = Product::get()->toArray();
- return \Excel::create('expertphp_demo', function($excel) use ($products) {
- $excel->sheet('sheet name', function($sheet) use ($products)
- {
- $sheet->fromArray($products);
- });
- })->download($type);
- }
- }
- }
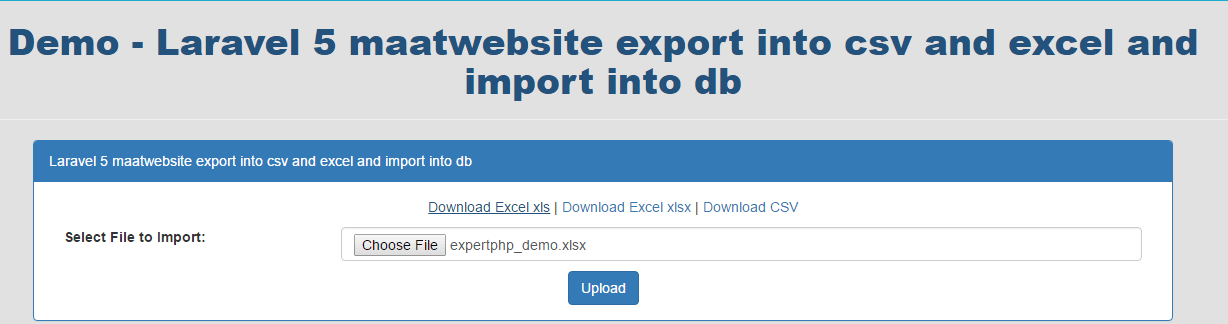
In this last step, we will create a view blade file file_import_export.blade.php in following path resources/views/ where you can select file to upload/import and download file into excel sheet.
- <html lang="en">
- <head>
- <title>Laravel 5 maatwebsite export into csv and excel and import into DB</title>
- <link rel="stylesheet" href="https://maxcdn.bootstrapcdn.com/bootstrap/3.3.6/css/bootstrap.min.css" >
- </head>
- <body>
- <div class="panel panel-primary">
- <div class="panel-heading">Laravel 5 maatwebsite export into csv and excel and import into DB</div>
- <div class="panel-body">
- <div class="row">
- <div class="col-xs-12 col-sm-12 col-md-12">
- <a href="{{ route('excel-file',['type'=>'xls']) }}">Download Excel xls</a> |
- <a href="{{ route('excel-file',['type'=>'xlsx']) }}">Download Excel xlsx</a> |
- <a href="{{ route('excel-file',['type'=>'csv']) }}">Download CSV</a>
- </div>
- </div>
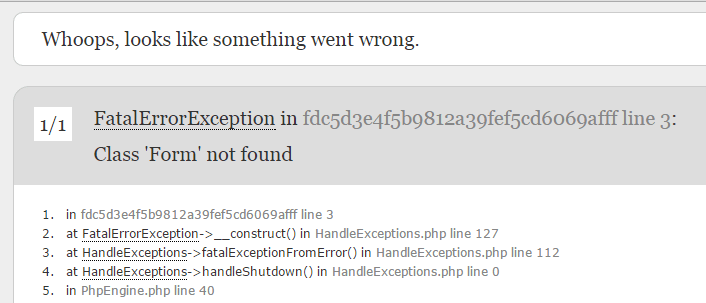
- {!! Form::open(array('route' => 'import-csv-excel','method'=>'POST','files'=>'true')) !!}
- <div class="row">
- <div class="col-xs-12 col-sm-12 col-md-12">
- <div class="form-group">
- {!! Form::label('sample_file','Select File to Import:',['class'=>'col-md-3']) !!}
- <div class="col-md-9">
- {!! Form::file('sample_file', array('class' => 'form-control')) !!}
- {!! $errors->first('sample_file', '<p class="alert alert-danger">:message</p>') !!}
- </div>
- </div>
- </div>
- <div class="col-xs-12 col-sm-12 col-md-12 text-center">
- {!! Form::submit('Upload',['class'=>'btn btn-primary']) !!}
- </div>
- </div>
- {!! Form::close() !!}
- </div>
- </div>
- </body>
- </html>
Click here to download the sample sheet to import data into database :Sample File


.jpg)