How to Upload File or Image With Validation and List File From Database in Laravel 5.2
As you know, Laravel provides awesome feature and It's very easy PHP Framework for developer to work with Laravel.
Working with upload file for image with validation in Laravel 5.2 is very easier and easy to validate files and their type in Laravel 5.2.
Here, you will find the complete code in Laravel 5.2 to upload files or images and store file name in database and displaye files or images to download . There are so many helper class available in Laravel and Form::file helper class is one of them.
First, you will have to create a table where you store file name, file path, file extention, file size and all. So We are going to create a product model according to table.
- namespace App;
- use Illuminate\Database\Eloquent\Model;
- class Product extends Model
- {
- public $fillable = ['name','details'];
- }
Add below line of code in your routes.php in following path app/Http/routes.php
- Route::resource('upload-files','FileController');
Now you will create FileController.php in following path app/Http/Controllers
- <?php
- namespace App\Http\Controllers;
- use Illuminate\Http\Request;
- use App\Http\Controllers\Controller;
- use App\Product;
- class FileController extends Controller {
- public function index(Request $request){
- $products = Product::orderBy('id','DESC')->paginate(5);
- return view('files.index',compact('products'))
- ->with('i', ($request->input('page', 1) - 1) * 5);
- }
- public function create(){
- return view('files.create');
- }
- public function store(Request $request) {
- $this->validate($request, [
- 'name' => 'required',
- 'details' => 'required',
- 'product_image' => 'required|image|mimes:jpeg,png,jpg,gif,svg|max:2048',
- ]);
- $product = new Product($request->input()) ;
- if($file = $request->hasFile('product_image')) {
- $file = $request->file('product_image') ;
- $fileName = $file->getClientOriginalName() ;
- $destinationPath = public_path().'/images/' ;
- $file->move($destinationPath,$fileName);
- $product->product_image = $fileName ;
- }
- $product->save() ;
- return redirect()->route('upload-files.index')
- ->with('success','You have successfully uploaded your files');
- }
- }
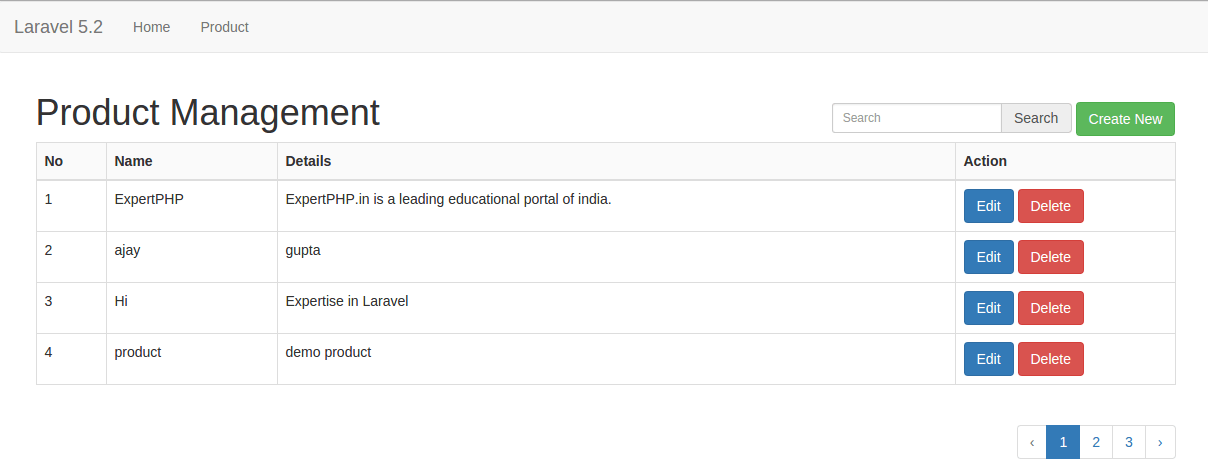
Create a directory 'files' in following path resources/views/ and then create index.blade.php in files directory to list down all product and their files.
- @extends('layouts.default')
- @section('content')
- <div class="row">
- <div class="col-lg-12 margin-tb">
- <div class="pull-left">
- <h2>List of Product Files</h2>
- </div>
- <div class="pull-right">
- <a class="btn btn-success" href="{{ route('upload-files.create') }}"> Upload New File</a>
- </div>
- </div>
- </div>
- <table class="table table-bordered">
- <tr>
- <th>No</th>
- <th>Name</th>
- <th>Details</th>
- <th>Your File</th>
- </tr>
- @foreach ($products as $product)
- <tr>
- <td>{{ ++$i }}</td>
- <td>{{ $product->name }}</td>
- <td>{{ $product->details }}</td>
- <td>
- <a href='{{ asset("images/$product->product_image") }}'>{{ $product->product_image }}</a>
- </td>
- </tr>
- @endforeach
- </table>
- {!! $products->render() !!}
- @endsection
Now at last create a form to upload file.
resources/views/files/create.blade.php
- @extends('layouts.default')
- @section('content')
- <div class="row">
- <div class="col-lg-12 margin-tb">
- <div class="pull-left">
- <h2>Upload Files</h2>
- </div>
- <div class="pull-right">
- <a class="btn btn-primary" href="{{ route('upload-files.index') }}"> Back</a>
- </div>
- </div>
- </div>
- {!! Form::open(array('route' => 'upload-files.store','method'=>'POST','files'=>true)) !!}
- <div class="row">
- <div class="col-xs-12 col-sm-12 col-md-6">
- <div class="form-group">
- <strong>Name:</strong>
- {!! Form::text('name', null, array('placeholder' => 'Name','class' => 'form-control')) !!}
- </div>
- </div>
- <div class="col-xs-12 col-sm-12 col-md-6">
- <div class="form-group">
- <strong>Upload File:</strong>
- {!! Form::file('product_image', array('class' => 'form-control')) !!}
- </div>
- </div>
- <div class="col-xs-12 col-sm-12 col-md-12">
- <div class="form-group">
- <strong>Details:</strong>
- {!! Form::textarea('details', null, array('placeholder' => 'Details','class' => 'form-control','style'=>'height:100px')) !!}
- </div>
- </div>
- <div class="col-xs-12 col-sm-12 col-md-12 text-center">
- <button type="submit" class="btn btn-primary">Submit</button>
- </div>
- </div>
- {!! Form::close() !!}
- @endsection
Now you can try with following code in your application to upload file with validation and display file from database in Laravel 5.2


.jpg)